Rollup fields can be a handy tool at your disposal if you need to calculate aggregate values of related records to give the user insights into data in the record relationships. One common scenario is using the COUNT() function to count the number of associated records. This can also be done using hierarchical relationships, i.e., aggregate values from related records and their related records.
How a Rollup field works
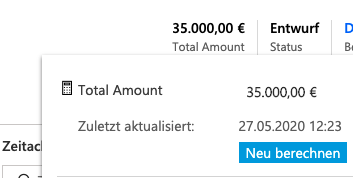
There are two ways the rollup field calculates values. By default, there is a reoccurring system job created automatically for each field, which recalculates the values at a scheduled interval (every 12 hours by default). Another way values are calculated is when a user triggers the calculation manually for the record they are on by clicking the refresh button underneath the field.
An administrator of the Power Platform or Dynamics 365 organization may change the interval by going to Settings > System Jobs > All Rollup Field Calculation Jobs and locating the entity you want to alter the interval for, in my case ‘Quote’.
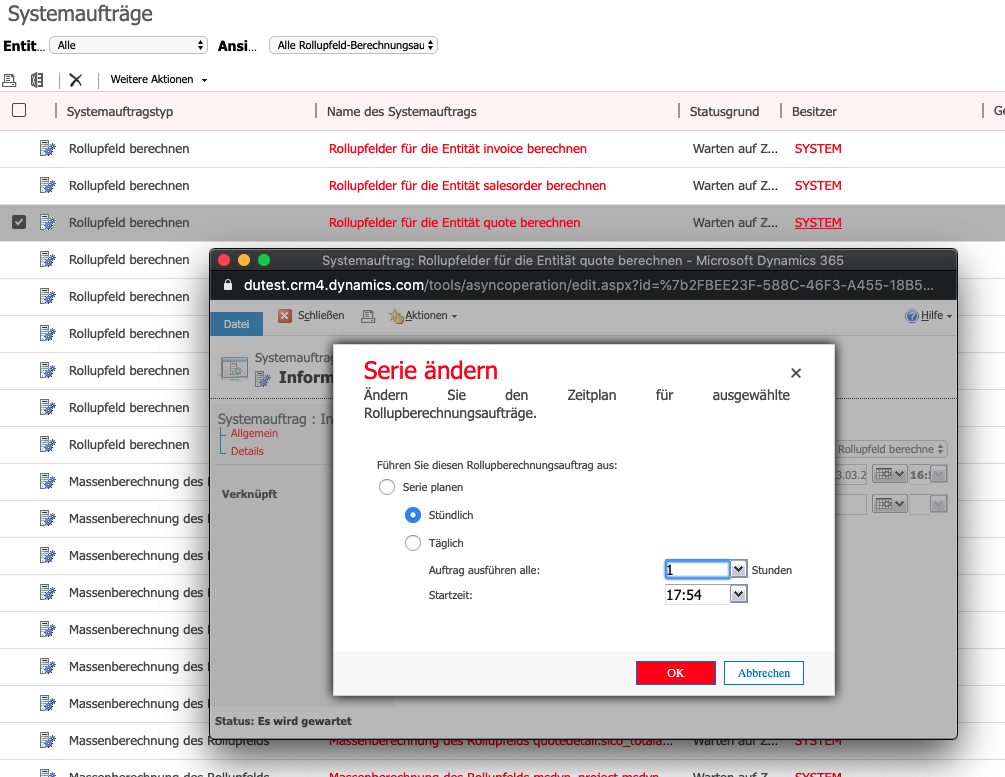
So that means unless we manually force the recalculation, we can only change the schedule of the jobs and not the frequency.
Automating field recalculation
There is, fortunately, a way to make sure the fields stay updated using the Power Platform Web API. We can make use of the CalculateRollupField function. (more info here: https://docs.microsoft.com/en-us/dynamics365/customer-engagement/web-api/calculaterollupfield?view=dynamics-ce-odata-9). I will demonstrate how you can go about calling this function on demand when you need it. We will begin by creating a custom connector in Power Automate and then creating a Flow that calls it to update the fields we have selected.
Creating a Custom Connector
You will first need to make sure that you already have a valid app registered in Azure Active Directory. If you do not, you can create one for your Power Platform instance by following the guide found here: https://docs.microsoft.com/en-us/powerapps/developer/common-data-service/walkthrough-register-app-azure-active-directory
Here are the steps to creating the CalculateRollupField Custom Connector:
- Sign in to Power Automate and navigate to Data > Custom Connectors
- Click + New custom connector and ‘Create from blank’.
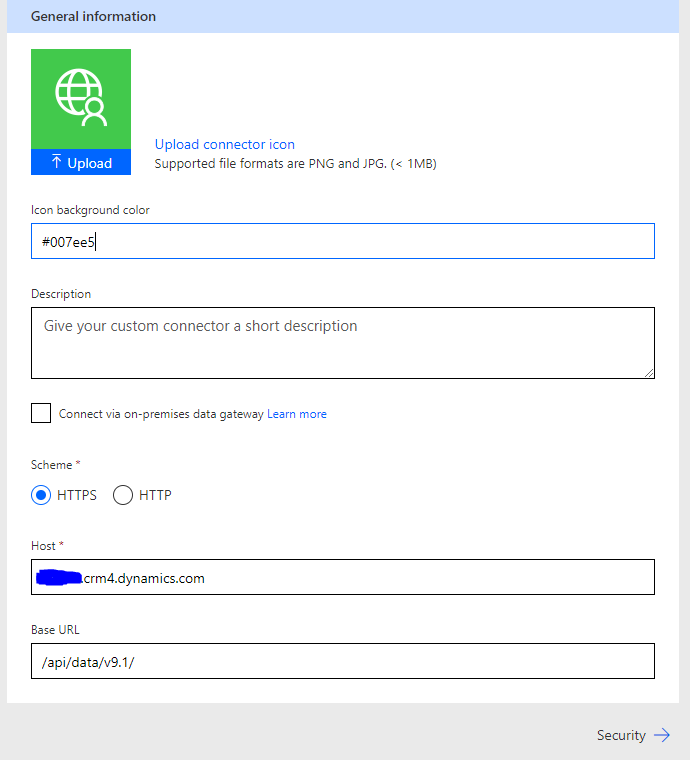
- Enter a name and then you will be directed to the General Information tab where you will fill in the Host and Base URL fields as shown below.
- Once you are done, click the Security button to navigate to the next screen.
5. Select OAuth 2.0 as the Authentication type.
6. For Identity Provider select Azure Active Directory and fill in the details from your registered app as shown below:
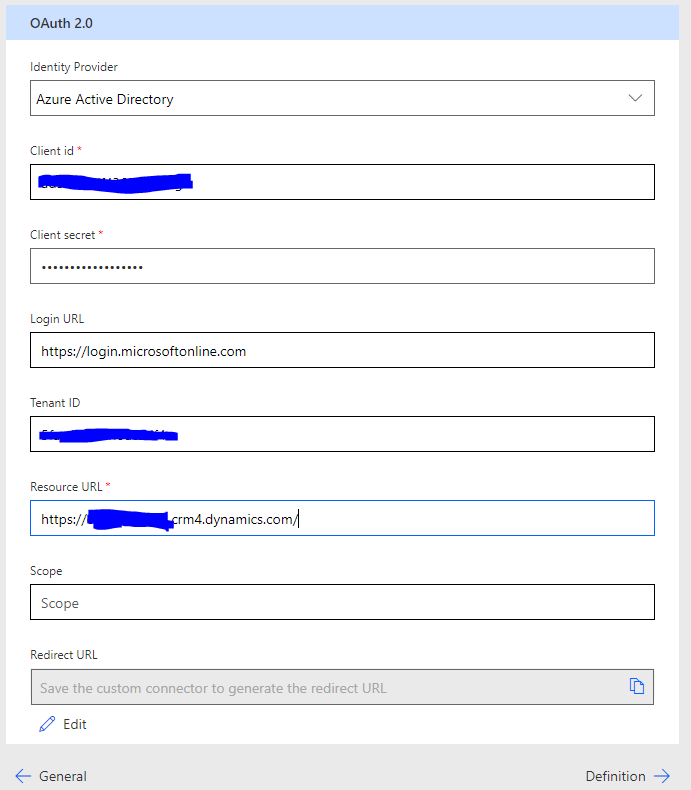
7. Add an action by clicking ‘New Action’ and enter all required information.
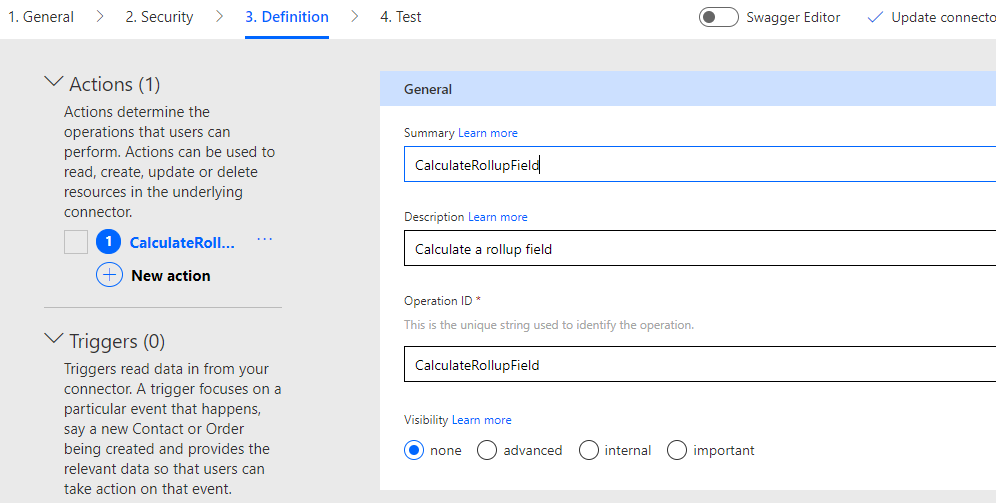
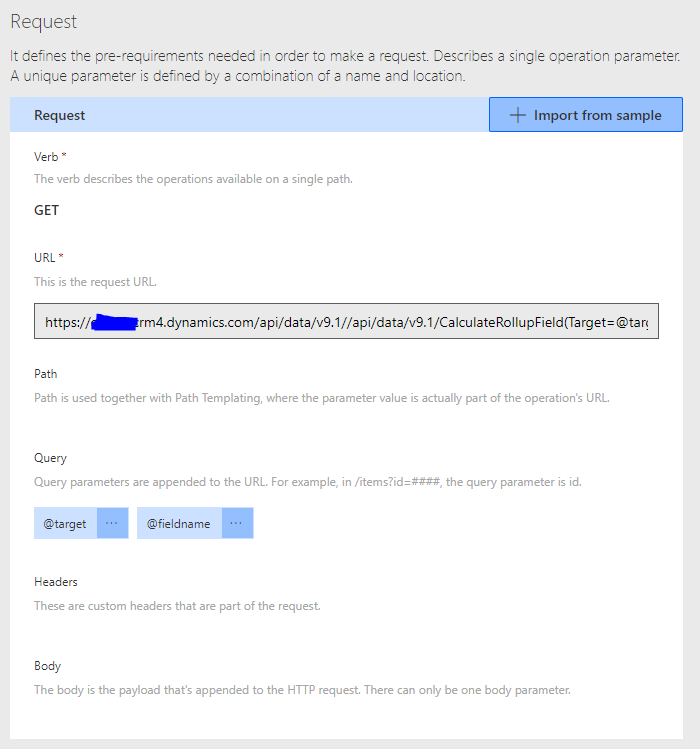
8. To define the requirements of the request you’ve created click ‘Import from sample’
9. In the Import from sample form select the option ‘GET’ and paste in the following URL pointing to your own environment:
https://[YOUR_ORG].crm4.dynamics.com/api/data/v9.1/CalculateRollupField(Target=@target,FieldName=@fieldname)?@target={‘@odata.id’:'[your_entity]([your_recordid])’}&@fieldname='[your_fieldname]’
10. Once you are done, click ‘Import’ to create the request and click on the ‘Test’ button to proceed. NOTE: make sure you click ‘Create connector’ before testing.
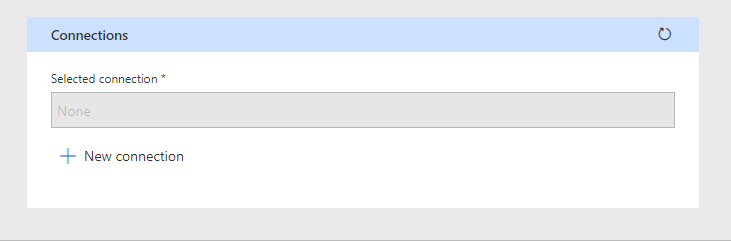
11. Create a connection and login to your account for testing.
12. In the @target parameter input the following
{‘@odata.id’:'[your_entity]([your_recordid])’}
13. In the @fieldname parameter input the following including the single quotation marks (‘)
‘[fieldname]’
NOTE: Be sure to have a look at the Web API EntityType Reference to ensure you are using the correct name for the Entity Set Path.

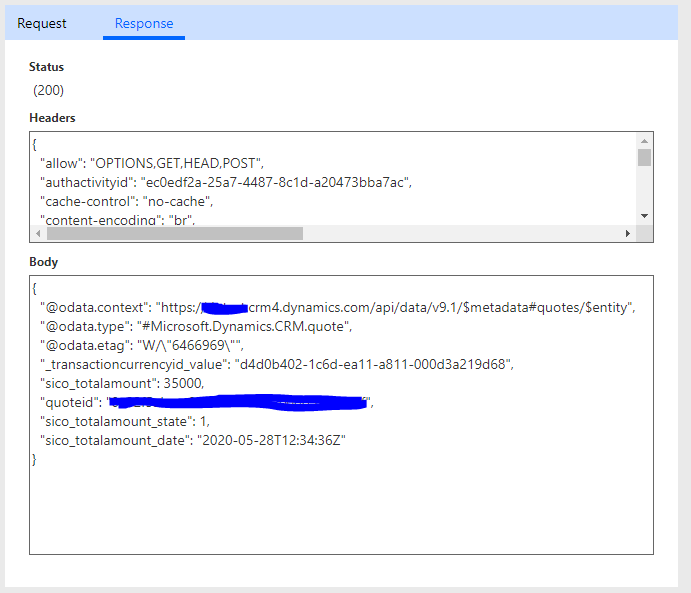
14. The response should return with a status (200) and it should look something similar to the image below:
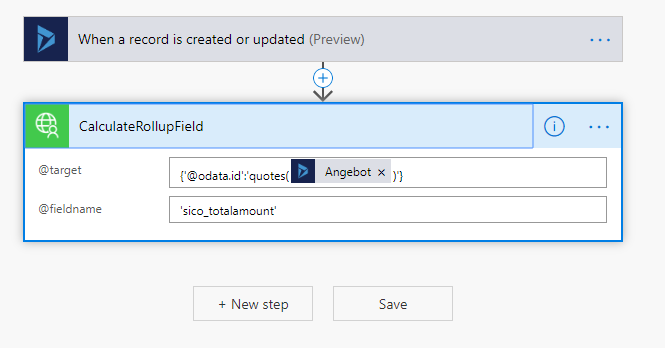
Create an On-Demand Flow to automatically calculate your Rollup fields
Now that you have successfully created your custom connector, lets put it into action!
For the purposes of this quick demo I created a simple Model-Driven App and included two entities, Quote and Quotedetail.
I have a rollup field on my Quote main form that calculates the sum of the amounts for all positions and displays a ‘Total Amount’. Basically, every time I update the Quote positions I want my ‘Total Amounts’ rollup field to automatically be recalculated to reflect the correct amount.
Once you have successfully tested your Flow then you are good to go and now have a rollup field that will automatically be recalculated based on the trigger of your choice!
